It’s time to get our irrigation systems ready for spring. We need to check every part, from main valves to drip emitters. This ensures a successful growing season. Breaking it down into steps will save us time, water, and money. Let’s go through a thorough irrigation system springtime inspection and startup together.

Key Points
- Inspect and clean all valves, removing debris and mineral deposits before turning on the main water supply.
- Test the backflow preventer and ensure all control valves are functioning properly to protect water quality.
- Program the irrigation controller with appropriate seasonal settings and watering schedules for spring conditions.
- Check all sprinkler heads and drip emitters for damage, clogs, or misalignment caused by winter conditions.
- Gradually restore water pressure while checking for leaks throughout the system’s zones and connections.
Essential Tools and Equipment Needed
Before starting up your irrigation system for the season, you’ll need several essential tools and basic equipment on hand. Let’s gather a pair of channel-lock pliers, adjustable wrench, wire cutters, and a flat-head screwdriver. We’ll also need a valve key or sprinkler wrench to access underground valves.
Don’t forget to bring along a small tarp or ground cover to kneel on while working, and keep a flashlight nearby for inspecting dark valve boxes. We recommend having spare sprinkler heads, nozzles, and valve parts ready for unexpected repairs. A marking flag kit will help us identify problem areas, and it’s smart to keep your system’s manual accessible. Lastly, make sure you have safety glasses and work gloves to protect yourself during maintenance. Regular system inspections and maintenance help prevent costly water waste while extending the lifespan of your irrigation components.
System Components Overview
Understanding your irrigation system’s core components is key to proper maintenance and troubleshooting. Let’s explore the essential parts that make up our systems. The main components include the controller (or timer), which serves as the brain of our operation, and the backflow preventer that keeps our drinking water safe.
We’ll also find valves that control water flow to different zones, and the main water line that connects to various lateral lines.
Our systems also rely on sprinkler heads or drip emitters to deliver water to our plants. Each type serves a specific purpose – rotors for large areas, spray heads for medium spaces, and drip lines for precise watering. Don’t forget the rain sensor, which prevents unnecessary watering during wet weather. Advanced pressure-driven systems can also efficiently deliver fertilizer solutions directly to plant root zones.
Locating and Inspecting Control Valves
Let’s start by checking behind shrubs and under mulch where our control boxes are often concealed. We’ll carefully clean the valve components, removing any dirt, debris, or mineral buildup that could affect performance.
Once cleaned, we can test each valve’s manual operation by turning the bleed screw or using the lever to guarantee proper function. Regular inspection helps prevent water stagnation issues that can damage your landscape and outdoor areas.
Finding Hidden Control Boxes
Control boxes for irrigation systems can be hard to find, like if you’ve just moved in or haven’t checked the system lately. Let’s find your system’s control box together using these methods.
We’ll start by looking in common locations. Check along the house foundation, near the garage, or by outdoor electrical outlets. Look for small, rectangular boxes on walls or at ground level.
If it’s not there, we’ll search near the main water supply or meter.
Still can’t find it? Check landscaped areas, where many irrigation zones meet. Sometimes, owners hide control boxes behind shrubs or under covers.
If needed, we can follow the irrigation system’s wiring. It usually leads to the control box.
Cleaning Valve Components
Once we find the control box, we’ll clean the valves. Remove dirt, debris, or mineral buildup from the valve components.
Start by brushing off loose soil. Check the diaphragm, solenoid, and flow control stem for damage. Use white vinegar and water to remove mineral buildup. Don’t forget to clean small ports and passages where water flows.
After cleaning, we’ll check the O-rings and seals. Replace any that are damaged. This cleaning ensures your irrigation system works well all season.
Testing Manual Operations
Manual testing starts with finding control valves in green boxes around your property. Mark their locations on a yard sketch for easy access later.
Once found, remove debris and inspect the valve boxes for damage. Check that each valve opens and closes smoothly. Listen for unusual sounds and look for leaks. If a valve is stuck or leaking, we’ll note it for repair or replacement.
Testing the Water Supply and Pressure
Before turning on sprinklers or valves, check if your water source can supply your irrigation system. We’ll verify the water supply and pressure to ensure everything works right. We’ll inspect key components for optimal performance.
- Make sure the main water valve is open and check for leaks
- Test the static water pressure with a pressure gauge at an outdoor spigot
- Check if the backflow prevention device is working and undamaged
- Monitor pressure while running one zone to set a baseline
Proper water flow distribution is key for healthy plants and efficient irrigation.
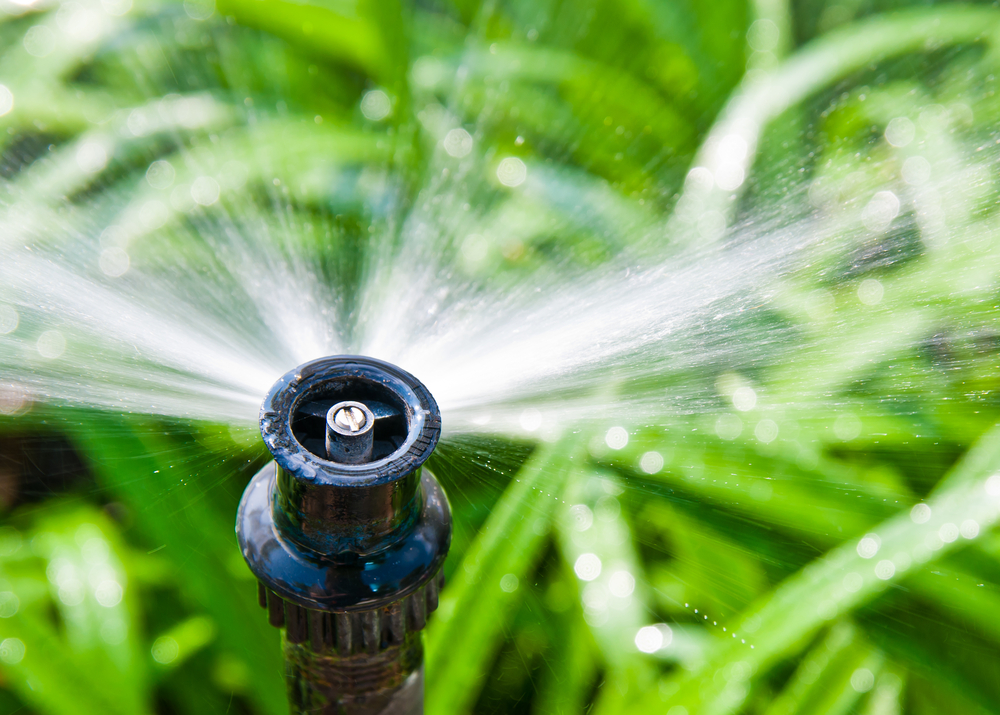
Checking Sprinkler Heads and Nozzles
First, we’ll test the water supply. Then, we’ll check each sprinkler head and nozzle. We’ll run each zone separately to see if heads pop up fully or spray right.
We’ll clean or replace any clogged nozzles. We’ll also straighten heads that aren’t straight. Look for damage like cracked casings or stuck heads.
If you see water pooling or dry spots, we might adjust heads. We’ll check that heads rotate and spray in the right zones. Broken parts will be replaced to keep your lawn watered evenly. Our Rain Bird Licensed team will check each zone carefully.
Programming Your Irrigation Controller
With the heads working right, we’ll set up your irrigation controller. We’ll make sure your system waters just right, saving water and keeping your lawn healthy.
Before we start, let’s look at what affects our settings:
- Local watering rules and allowed days
- Different plant zones and their water needs
- Seasonal adjustments for weather changes
- Best watering times (early morning, 4-6 AM)
We’ll put these settings into your controller. We’ll set the time and date first. Then, we’ll create programs for each zone. We’ll adjust run times for your soil and plants, making sure they get what they need.
Installing smart irrigation controllers will adjust schedules based on weather.
Inspecting Drip Lines and Emitters
First, we’ll check the water flow and pressure in drip lines. We’ll look for leaks like wet spots or damaged tubing. Drip irrigation systems water plants directly, saving water and reducing evaporation.
We’ll also clean drip emitters to remove dirt and mineral deposits. This prevents clogs and ensures efficient watering.
Check Flow and Pressure
Regular checks of drip lines and emitters prevent problems that can harm plants or waste water. We’ll make sure your irrigation system works well.
First, we’ll turn on the system and look for key indicators:
- Water pressure that’s too high or low, which affects distribution uniformity
- Unusual sounds like hissing or gurgling that signal potential leaks
- Flow rates at emitters that don’t match manufacturer specifications
- Water coverage patterns that appear uneven or incomplete
We want consistent pressure throughout the system. We’ll adjust the pressure regulator if needed. If emitters spray or mist instead of drip, we’ll fix pressure issues right away.
Look for Leaks
After checking system pressure, a thorough leak inspection is key. We’ll check each irrigation line for water pooling, spurting, or seeping. We’ll also examine fittings, valves, and connections for drips or moisture.
We’ll inspect sprinkler heads and drip emitters for cracked casings, loose connections, or clogged nozzles. The backflow preventer and main valve are also checked for leaks. Finding a leak, we’ll mark it for repair before running the system at full capacity.
Clean Clogged Drip Points
Drip irrigation systems can get clogged by mineral deposits and debris. We’ll work together to clear these blockages and get your system flowing right.
Here’s what we’ll need to tackle those clogged drip points:
- Mix a solution of equal parts white vinegar and water to dissolve mineral buildup
- Use a small wire brush to gently clean around emitter openings
- Flush the system by running it at full pressure for several minutes
- Replace any emitters that remain clogged after cleaning
Installing a filter at the system’s source and regular maintenance can prevent future clogs. If flow is still reduced, we might need to check for larger blockages in the main lines.
Detecting and Repairing System Leaks
Maintaining a leak-free irrigation system requires careful inspection and prompt repairs. Let’s walk through the key signs of leaks and how we can fix them together.
| Problem Signs | Quick Fixes |
|---|---|
| Soggy Areas | Tighten fittings |
| Higher Water Bill | Replace cracked pipes |
| Low Pressure | Seal joints |
| Green Patches | Fix valve leaks |
| Bubbling Water | Install new gaskets |
We’ll turn on the system and watch for sprays, pooling water, or hissing sounds. Marking leaks and shutting off the water supply is crucial. For small leaks, pipe tape or a coupling might solve the problem. Larger issues might need digging and replacing damaged sections. Catching leaks early saves water and protects our landscaping. While DIY repairs work for simple fixes, complex system repairs often need a pro.
Zone-by-Zone Testing and Adjustments
Testing each irrigation zone systematically ensures ideal coverage and prevents water waste. Let’s go through each zone together, making adjustments to verify your system performs at its best.
- Start by running each zone for 3-5 minutes while we check spray patterns and head rotation
- Look for heads that are tilted, sunken, or blocked by growing plants or debris
- Adjust spray radius and arc settings to avoid watering sidewalks or structures
- Fine-tune the pressure at each head to eliminate misting or fogging
We’ll observe water distribution and note any dry spots or oversaturated areas. This step ensures our irrigation system works efficiently all season. Using sustainable drainage techniques also protects your foundation and promotes plant health.
Maintenance Schedule Planning
We need a good maintenance schedule for your irrigation system. Let’s plan together to keep it running smoothly. This will make you confident in your maintenance routine.
| Task | Frequency |
|---|---|
| Visual Inspection | Weekly |
| Head Cleaning | Monthly |
| Pressure Check | Quarterly |
Set reminders for each task. Weekly checks catch small issues early. Monthly cleanings remove debris and check rotation. Quarterly pressure checks ensure top performance. Many neighbors follow similar schedules, and we’re here to help.
Using backflow prevention devices protects your water supply.
Frequently Asked Questions
When Is the Best Time to Start up My Irrigation System in Spring?
Start up when temperatures are above freezing at night and soil is workable. This is usually 2-3 weeks after the last frost.
How Long Should I Wait After Winterization Before Starting up Again?
Wait until all frost danger has passed and temperatures stay above freezing. This is usually 3-4 months after winterization. Spring soil must thaw completely before it’s safe.
Can I Add New Zones to My Existing Irrigation System?
Yes, we can add new zones to your system. This upgrade expands coverage to new areas, but we’ll check capacity first.
What Chemicals Are Safe to Use for Cleaning Irrigation System Pipes?
Use vinegar, hydrogen peroxide, or chlorine bleach diluted with water. Avoid harsh chemicals that can harm plants or soil. Flush thoroughly after cleaning.
Should I Hire a Professional or Can I Start up Myself?
If you’re comfortable with plumbing, DIY startup is fine. But, if unsure, hire a professional to avoid mistakes and costly repairs.
Takeaway
Our springtime irrigation system inspection and startup are complete. We’re ready for a successful growing season. Our system is checked, cleaned, and adjusted for water savings and prevention of costly repairs. Let’s keep up with regular maintenance to ensure our system performs at its best. We’re set for worry-free watering all season.