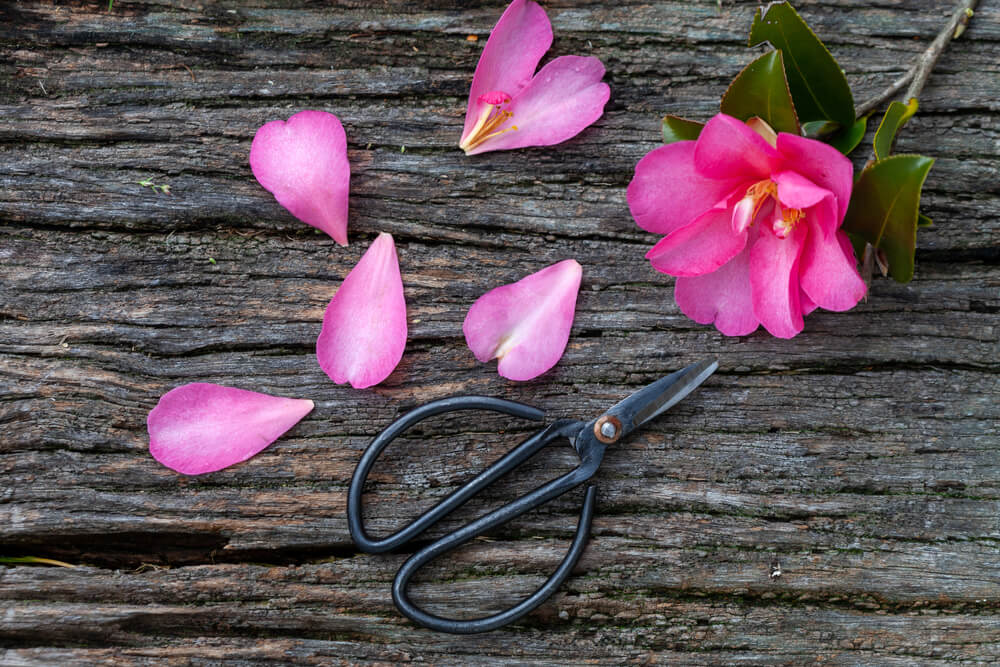
Essential Tips for Beautiful Blooms on Camellias
Are you longing to see your camellias flourish and bloom in all their beauty? Pruning may be the game-changer you’ve been waiting for! In this blog post, we’ll guide you through simple yet effective pruning techniques tailored to camellias – the secret to enviable, vibrant blooms. Tend to your garden like a pro with CC Land Design’s wealth of expert advice. Let’s revolutionize your gardening routine, bring out the best of your blossoms, and turn heads in Metairie starting today!
Correct Way To Prune Your Camellias
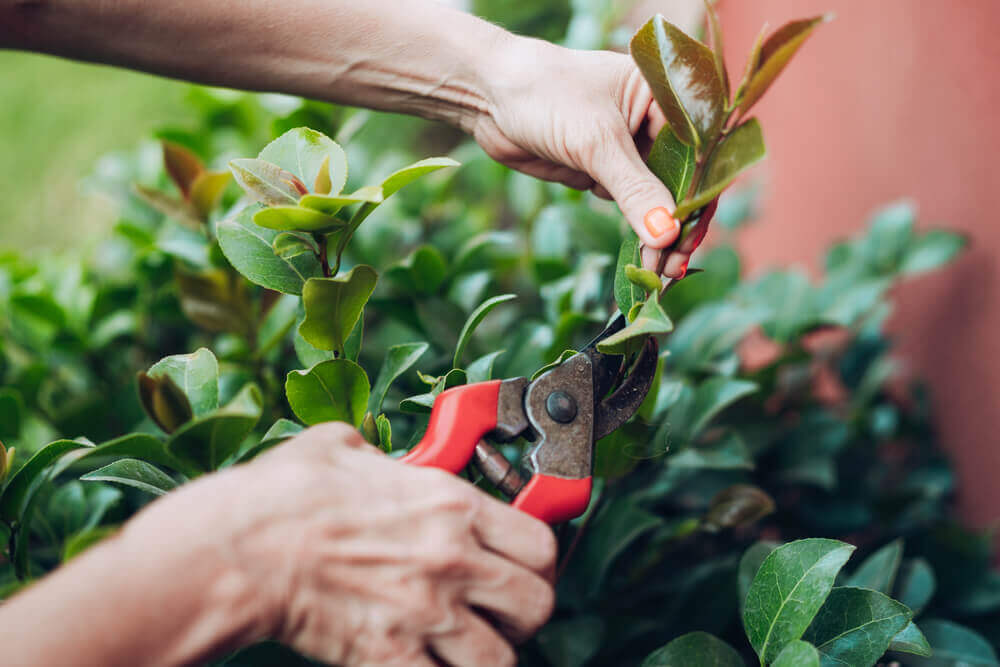
Pruning is an essential aspect of maintaining healthy and beautiful camellias. When done correctly, pruning promotes new growth, improves the shape of the plant, and enhances overall blooming. However, it’s crucial to approach camellia pruning with care and knowledge to avoid damaging the plant or inhibiting its ability to produce those stunning blooms. Let’s explore the correct way to prune your camellias so that you can enjoy a flourishing and picturesque garden.
The best time to prune camellias is right after they finish flowering. This typically occurs in late winter or early spring, depending on your region and the specific variety of camellia you have. Start by removing any dead or damaged branches, ensuring clean cuts as close to the main stem as possible. For instance, if you notice a branch that dried up during winter, remove it entirely by cutting just above where another viable branch intersects with the main stem. Removing dead or dying branches not only improves the appearance of your camellia but also encourages new growth in the healthy parts of the plant.
Next, consider perfecting needle-leaf pruning technique for your camellias. This involves selectively removing twiggy growth and crowded foliage within the interior of the plant while leaving the main framework intact. Thin out any branches that are growing inward toward the center of the plant or rubbing against one another. By opening up the interior of the camellia bush, you allow better air circulation and light penetration to reach all parts of the plant – fostering overall health and reducing risks of disease and pests.
While pruning your camellias, it’s important to step back occasionally and assess their shape and overall structure. Aim for a balanced and natural appearance, keeping in mind that heavily pruned plants may take longer to recover and produce blooms. Hence, it’s advisable to prune conservatively if you’re unsure, gradually shaping the plant over a few seasons until you achieve the desired look. Remember, the goal is to maintain the natural elegance of your camellias while enhancing their health and vigor.
- Pruning is essential for maintaining healthy and beautiful camellias. By pruning correctly, you can promote new growth, improve the shape of the plant, and enhance overall blooming. The best time to prune camellias is after they finish flowering, usually in late winter or early spring. Start by removing any dead or damaged branches, making clean cuts close to the main stem. This not only improves the appearance of the plant but also encourages new growth. Consider using needle-leaf pruning to selectively remove twiggy growth and crowded foliage within the interior of the plant, while leaving the main framework intact. By opening up the interior, you allow better air circulation and light penetration, reducing the risks of disease and pests. Step back occasionally to assess the shape and structure of your camellias, aiming for a balanced and natural appearance. Prune conservatively if unsure, gradually shaping the plant over multiple seasons. The goal is to maintain the natural elegance of your camellias while enhancing their health and vigor.
Eliminating Dead and Dying Branches
Dead and dying branches not only mar the appearance of your camellias but also pose potential risks to their health. These branches can serve as entry points for diseases or pests that could spread throughout the entire plant if left untreated. Therefore, it’s crucial to identify and eliminate these branches promptly and efficiently.
Start by examining the foliage of your camellias carefully. Dead branches often lack buds or leaves and may appear dry or withered. For instance, you might notice a branch that displays no signs of healthy growth whatsoever, with brown or brittle twigs. In such cases, use sharp bypass pruners or loppers to remove these branches completely, making clean cuts just above a leaf node or where another branch meets the main stem. By removing dead and dying branches, you not only improve the overall aesthetics of your camellia but also redirect its resources towards healthier parts of the plant.
Remember to periodically inspect your camellias throughout the year for any signs of damage or disease. Promptly eliminating dead and dying branches will help maintain the vitality and beauty of your plants while reducing potential risks to their well-being.
Perfecting Needle-Leaf Pruning
When it comes to pruning your camellias, one essential technique to master is needle-leaf pruning. This method involves selectively removing individual branches or stems to shape the plant and promote optimal growth and flowering. The goal is to achieve a balanced and open structure that allows for proper air circulation and sunlight penetration.
To perfect needle-leaf pruning, start by assessing your camellia shrub’s overall form and health. Look for any damaged or diseased branches, as well as those that are crossing or rubbing against each other. These should be your primary targets for removal. Additionally, keep an eye out for any weak or spindly growth that may be hindering the overall vigor of the plant.
Once you have identified the branches to prune, utilize sharp bypass pruners or shears to make clean and precise cuts. Aim to cut just above a bud or lateral branch, ensuring that the angle of the cut is slightly sloping away from the bud. This helps redirect growth outward and prevents water from pooling on the wound.
Imagine you have a camellia shrub with several branches growing too close together, blocking sunlight from reaching the inner parts of the plant. By carefully selecting which branches to remove through needle-leaf pruning, you can create space between them, allowing light to penetrate deeper into the canopy, promoting better airflow and reducing the risk of diseases like powdery mildew.
Remember to step back periodically while pruning to assess how your shaping efforts are unfolding. It’s essential to maintain a natural appearance, avoiding over-pruning that could leave the plant sparse or unbalanced in its growth pattern. Strive for a healthy balance between openness and foliage density.
Throughout the process of needle-leaf pruning, be mindful of not removing more than 30% of the total growth in a single season. Pruning too heavily can shock the plant and inhibit its ability to produce new growth and flowers. Consistency is key, so consider incorporating regular light pruning sessions throughout the year to maintain your camellia’s shape.
With needle-leaf pruning covered, let’s now delve into another crucial aspect of camellia care: shaping for optimal flowering.
Shaping for Optimal Flowering
Shaping your camellias is not only about aesthetics but also plays a vital role in ensuring optimal flower production. By following specific techniques, you can encourage an abundance of beautiful blooms year after year.
The first step in shaping for optimal flowering is to understand the growth habits and patterns of your camellia variety. Camellias come in various forms such as upright, weeping, or spreading, and understanding these growth habits will guide you in pruning and shaping decisions.
One technique that proves effective for shaping camellias is selective heading back. This involves identifying the main branches that need shaping and shortening them by cutting just above an outward-facing bud or lateral branch. By doing so, you redirect growth outward, stimulating the development of new shoots and ultimately increasing flower production.
Another method often used for shaping is known as thinning cuts. Thinning cuts involve removing entire branches from the base or point of attachment to create space and allow more airflow within the plant’s structure. This technique helps prevent overcrowding and reduces the risk of pests and diseases.
Picture a camellia shrub with dense foliage that hides its beautiful flowers. By implementing selective heading back and thinning cuts strategically, you can open up the canopy, allowing sunlight to reach deep into the plant. As a result, buds are more likely to develop into vibrant flowers instead of being hidden among layers of leaves.
Timing is crucial when it comes to shaping for optimal flowering. The ideal time to prune camellias is shortly after their blooming period ends, typically in the late winter or early spring. This not only allows you to remove any spent flowers but also gives the plant ample time to produce new growth and set buds for the next flowering season.
Identifying the Right Pruning Season
Pruning camellias is a crucial step in maintaining their health and ensuring beautiful blooms year after year. One of the key factors to consider when pruning camellias is the appropriate pruning season. Timing is essential, as pruning at the right time can promote healthy growth and abundant flowering.
The ideal time to prune camellias is after they have finished blooming, typically in late spring or early summer. This timing allows the plants to recover from any potential stress caused by pruning before the next growth cycle begins. Pruning during this period also ensures that you won’t be cutting off any flower buds for the upcoming blooming season.
However, it’s important to note that there are different types of camellias, including both spring-blooming and fall-blooming varieties. Understanding the specific type of camellia you have will help determine the best pruning season.
For spring-blooming camellias, prune them immediately after they finish blooming in spring or early summer. This gives them ample time to develop new growth and set new flower buds for the following year.
On the other hand, fall-blooming camellias should be pruned in late winter or early spring when they are still dormant. Pruning during this period encourages new growth and helps shape the plant before it starts producing its beautiful fall blooms.
It’s crucial to avoid pruning too close to winter in regions where freezing temperatures are common, as this can expose newly pruned branches to cold damage.
Some gardeners may be tempted to prune their camellias during other times of the year, such as late fall or winter. However, it’s generally best to refrain from pruning during these periods as it can interfere with the natural growth cycle of the plant and potentially reduce flowering.
By identifying and adhering to the correct pruning season for your specific type of camellia, you can ensure that your plants thrive and produce an abundance of beautiful blooms.
Layering Techniques for Camellias
Layering is a propagation technique often used to expand the number of camellia plants in a garden. It involves creating new plants from the stems or branches of existing ones. This method is particularly useful when you have a favorite camellia and want to duplicate it or share it with others.
There are several layering techniques that can be used for camellias, including air layering and ground layering.
Air layering involves making an incision in a stem or branch and covering it with moist sphagnum moss or rooting hormone. The covered section is then wrapped in plastic to create a moist environment. Over time, roots will develop within the moist moss, allowing you to separate that portion of the plant as a new individual.
Ground layering, on the other hand, involves bending a low-growing branch down to the ground and covering a portion of it with soil or compost. The covered part remains connected to the parent plant while encouraging root development. Once sufficient roots have formed, you can sever the branch from the parent plant and transplant it as a new camellia.
Whichever layering technique you choose, patience is key. It can take several months for proper root development to occur, so it’s important not to rush the process. Regular monitoring of moisture levels is also essential to ensure successful propagation.
Layering offers an excellent opportunity to propagate camellias without relying on seeds or cuttings, allowing for greater control over the genetics and characteristics of the new plants.
Before attempting any layering technique, it’s recommended to thoroughly research and understand the specific requirements and steps involved for each method. Proper technique and care will greatly increase your chances of successfully propagating new camellias through layering.
With these layering techniques in your gardening arsenal, you can expand your collection of camellias and enjoy their stunning blooms throughout your garden or share the beauty with fellow garden enthusiasts.
Adapting Pruning for Indoor and Outdoor Camellias
Camellias are known for their beautiful blooms and lush foliage, whether they are grown indoors or outdoors. However, the approach to pruning these plants can vary depending on their growing environment. Understanding how to adapt pruning techniques for indoor and outdoor camellias is crucial in maintaining their health and promoting optimal growth.
When it comes to indoor camellias, you’ll need to consider the limited space they have to grow. These plants are usually kept in pots or containers, making them more susceptible to becoming root-bound if not properly pruned. As a rule, prune indoor camellias after they have finished flowering. This allows them to focus their energy on producing new growth and helps maintain their shape.
Begin by removing any dead or damaged branches, making clean cuts just above healthy buds or leaf nodes. This helps prevent the spread of diseases and encourages new shoots to emerge from those nodes. Additionally, thinning out crowded areas by selectively removing old or weak branches allows sunlight and air circulation throughout the plant, reducing the risk of fungal infections.
Imagine you have a beautiful indoor camellia that has produced several dense branches near the center. Pruning would involve carefully selecting branches that are crossing or rubbing against each other and removing them at the base, taking care not to damage the main stem or healthy shoots. By doing so, you create space for healthier growth and improve the overall appearance of the plant.
In contrast, outdoor camellias have more freedom to spread out and grow larger in size. Pruning outdoor camellias primarily focuses on maintaining their desired shape, controlling size, and improving flowering performance. The best time to prune outdoor camellias is immediately after they finish blooming but before new growth appears in spring.
Start by removing any dead or diseased wood as well as weak or spindly branches. This helps improve air circulation and reduces the risk of pests and diseases. Next, consider any branches that are growing inward or crossing each other, as these can create congestion and hinder healthy growth. Prune these branches just above a bud or leaf node to promote new growth in the desired direction.
Let’s say you have an outdoor camellia bush that has become quite large and unruly. Pruning would involve selectively cutting back some of the longer branches to control its size and shape. By removing excessive growth from the center of the plant and encouraging outward growth, you create a more balanced and aesthetically pleasing appearance. Additionally, pruning off spent flowers can stimulate new blossoms and prolong the blooming period.
Whether you have indoor or outdoor camellias, understanding how to adapt your pruning techniques to their specific needs is crucial in maintaining their beauty and health. By following these guidelines, you can promote healthy growth, control size, and enhance flowering performance.